This is a quick walk through on how to create a public link on Synology NAS. Your NAS must be running DSM 5 + for this tutorial to work. If you’re more into videos, you can find my walk through on how to share public links on Synology NAS here.
The reason for this video is not because it’s not an intuitive process, but the links generated in the platform will not work off network. Therefore, to create a public link on Synology NAS there are a couple additional, simple steps.
Create Public Link on Synology NAS
1. Log into DSM.
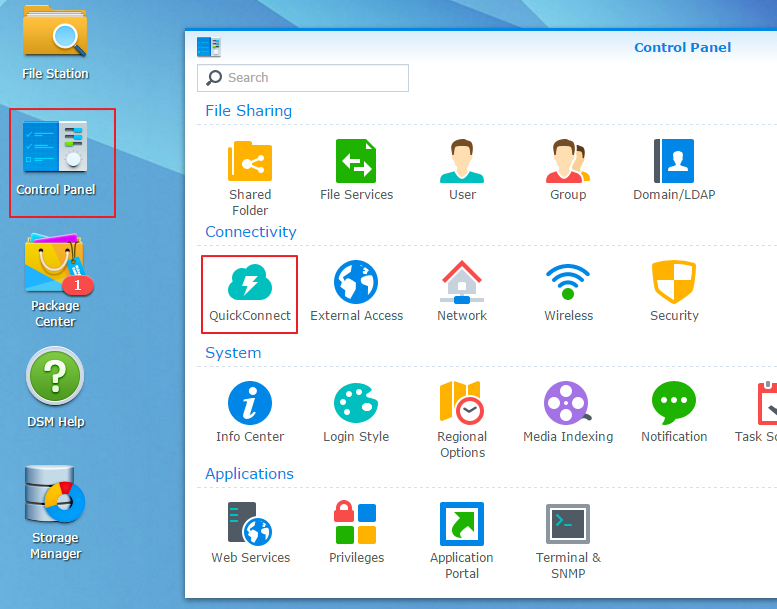
2. Control Panel > QuickConnect:
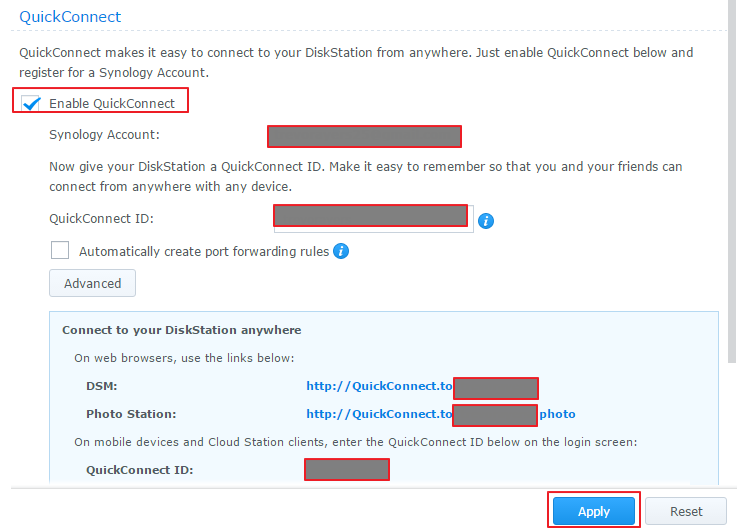
3. Enable QuickConnect > Set Your Email > Set Your QuickConnect ID > Apply. There may be a quick email verification process.
4. Note your DSM address for your permanent records. This address will be static for you. I recommend copying and pasting somewhere for our following steps. The DSM address will be http://QuickConnect.to/yourquickconnect
* Note that QuickConnect accounts act as port forwarding and are used for far more than creating public links to share
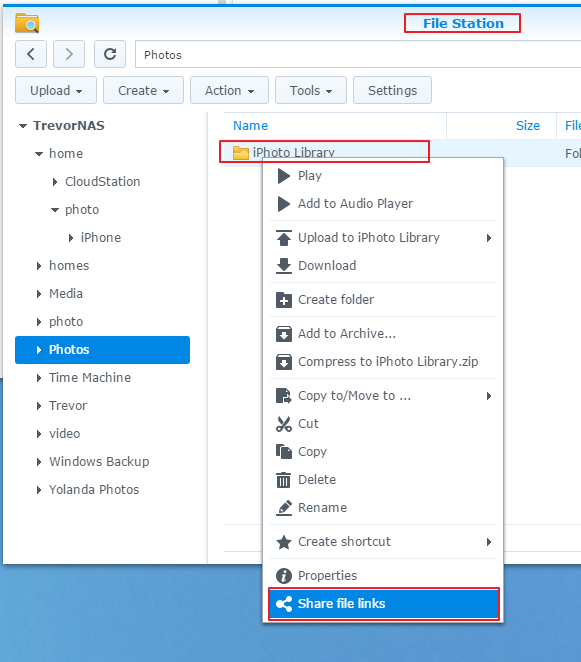
5. Go to file station and right click on the file you want to share > Share File Links:
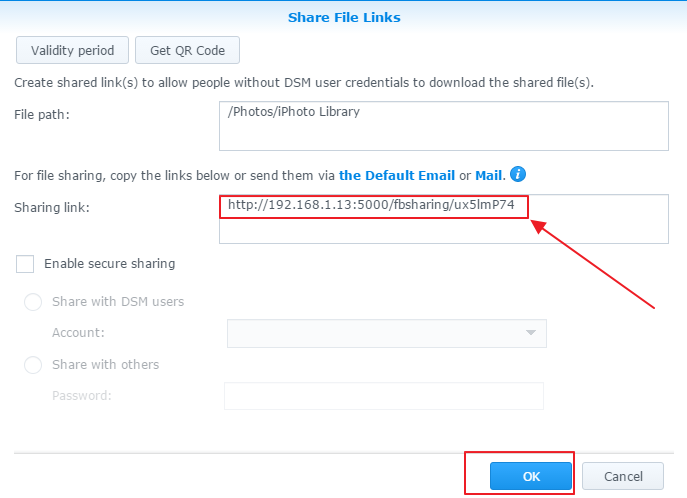
6. Configure settings to your liking and copy “Sharing Link” and hit “OK.” I usually set a validity period and will sometimes set a password.
This link will work for intra-network sharing.
7. Combine the path from “Sharing link” in the last step with your permanent QuickConnect URL:
For this example, I have combined my example paths:
QuickConnect Link:
http://QuickConnect.to/yourquickconnect
Sharing Link:
http://192.168.1.13:5000/fbsharing/ux5lmP74
Working public link:
http://QuickConnect.to/yourquickconnect/fbsharing/ux5lmP74
That’s how you create public links on a Synology NAS. I wish it defaulted to the QuickConnect address as the sharing link when you have an account, but I still love the machine.


