As many of you are aware, you can use Google Apps to handle your domain and business emails. This allows an almost-infinite possibility of domains to all have the full functions of a Gmail account. For example, I could use an @trevorayers.com email address and manage it via Google Apps. This is a quick walk through on how to add free domain emails using Google Apps. This process also works for @gmail.com address to consolidate accounts, but there’s never a charge with these.
Please note that you will need to maintain a Google Apps account for your business with at least one paid email account. This process will allow you to add unlimited emails to your Google Apps account without racking up a $5 charge for each. These will be alias accounts, so they won’t have their own dedicated cloud storage, but you can receive email to these addresses and, most importantly, send email from these addresses with these steps. This means no recurring charges for your info@domain.com addresses of the world. Time to add our free domain email using Google Apps.
We’ll first create the alias email address, which will handle the email forwarding and then we’ll configure it to Gmail, so that we can send email from this address.
How To Add Free Domain Emails Using Google Apps
Create Alias Email:
1) Log in to the admin console using an administrator account for Google Apps. Login found at admin.google.com.
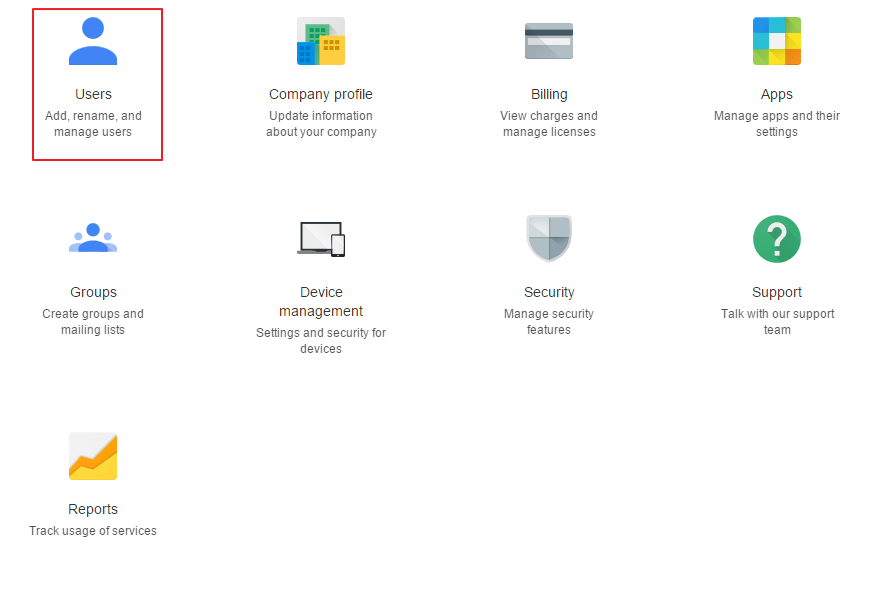
2) Click the “Users” Icon:
2) Select the user you want to manage the free domain email from. This will be the email that recipient of the forwarding address:
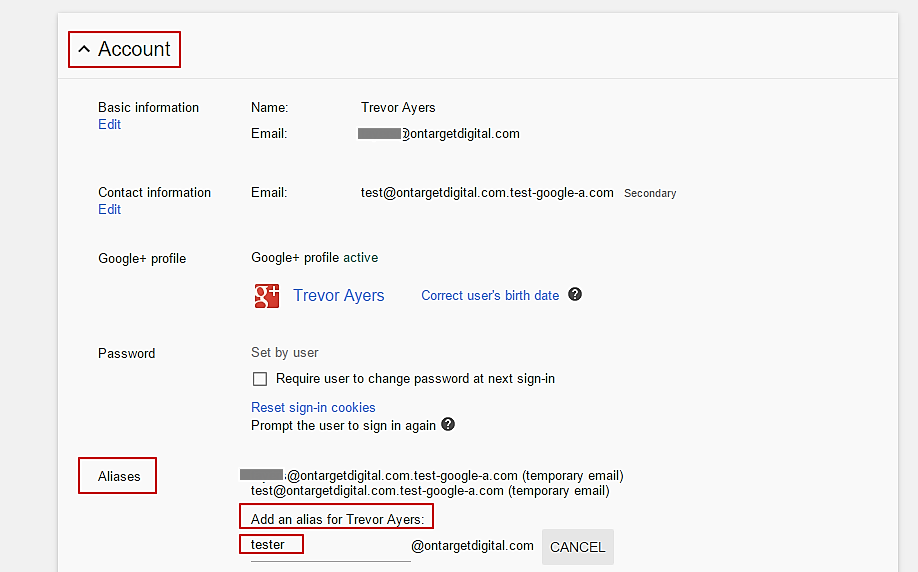
3) Click on Account > Aliases > Add an Alias > Type in the desired email > Hit Enter or Save Changes:
*Receiving emails to this address is now covered. Next steps are to send email as this address
Add “Send Mail As” Account:
4) Hop over to Gmail in your browser. Log in if not already.
5) Gear Icon > Settings > Accounts Tab > Click – Add Another Email Address You Own:
6) In the Pop-up, enter in the same email you created the alias for in step 3. Make sure “Treat as alias” is checked and click next step.
7) Follow the email verification steps. Since the email alias has already been built the verification email should arrive in this very account.
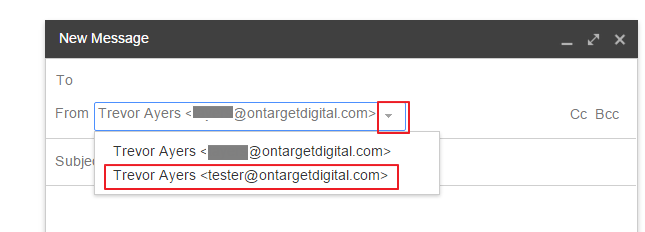
You’re done! Now when you go to compose a new email within Gmail you’ll see a drop-down option in the from field to select your alias account which you don’t pay anything for! That’s an overview on how to add free domain emails using Google Apps.


