This will be a quick walk through on how to create iPhone ringtones from your iTunes library. It’s actually easy to create iPhone ringtones from your iTunes library, but this is not greatly documented because, obviously, Apple would like to profit on your creation of ringtones. This process to create iPhone ringtones from your iTunes library is the same on Mac and PC, but these screenshots will be from a Windows machine.
What You Need to Create iPhone Ringtones From Your iTunes Library
- i device
- iTunes
- One song loaded in iTunes
How to Create iPhone Ringtones From Your iTunes Library
1. Listen to your song and find the roughly 30 seconds you want as your ringtone. Note the time start and finish.
2. Right click on song and click “Get Info:”
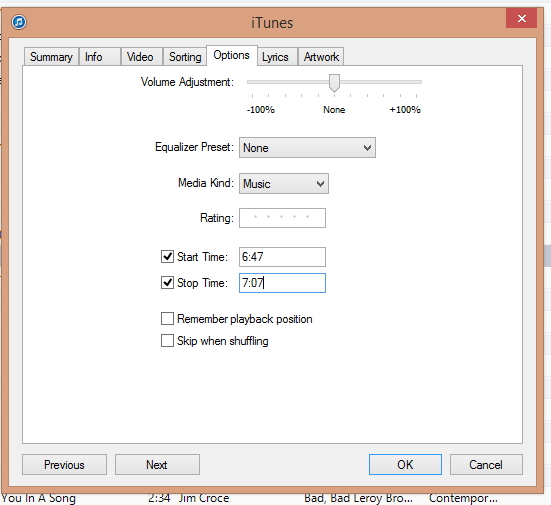
3. Go to the “Options” tab and set both a start and stop time. After selecting your time click “OK.”
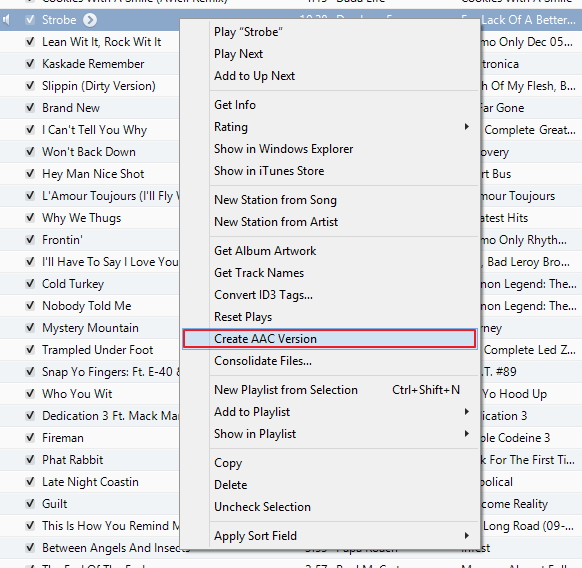
4. Right click on same song and select “Create AAC Version:”
5. Drag the newly created file to your desktop. If sorted by date added this will jump to the top. You can also right click on the folder and click “copy” then right click on your desktop and click paste.
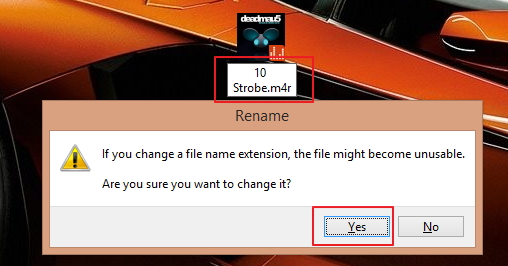
6. Change the file extension from .m4a to .m4r. Approve whatever prompt you receive after doing so as this will differ between operating systems.
7. Right click on the version you copied to your desktop in step 5 and delete.
8. Drag the .m4r file on your desktop to iTunes. Alternatively you can right click on the file and specify “open with” > “iTunes.”
9. You’ll now find your song under “tones” and it will synch with you iDevice as a ringtone and be found under tones:
*If you don’t see the “tones” option go to Edit > Preferences and on the default, general tab make sure “tones” is checked.
10. Go back to your original file and revert steps 2 and 3. This will ensure your song is not truncated in the future and maintain the original.
That’s how to create iPhone ringtones from your iTunes library.


