 Google’s documentation on how to set up Google AdWords website call forwarding with Google Tag Manager is surprising light with some glaring omission for these both being Google properties. In fact, Google does support this, but Google’s documentation is missing one key element, which is that the dynamic number replacement is actually supported by Google and therefore, you don’t have to seek out a third-party solution.
It’s also very simple to set up AdWords website call forwarding with Google’s method – it’s just not covered in the documentation!
These are the steps for Google Tag Manager to get your number to exchange. You must have already followed Google’s instructions for setting up website call forwarding within AdWords and generated the code specific to your account for this to work. You must also already have a Google Tag Manager account with a container created and added to all pages on your site you wish to replace a number.
How to Set Up Google AdWords Website Call Forwarding with Google Tag Manager
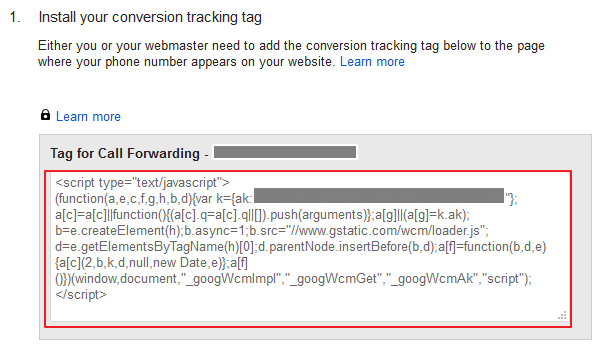
1) Grab your code generated when you created your conversion for Google website call forwarding number in Google AdWords:
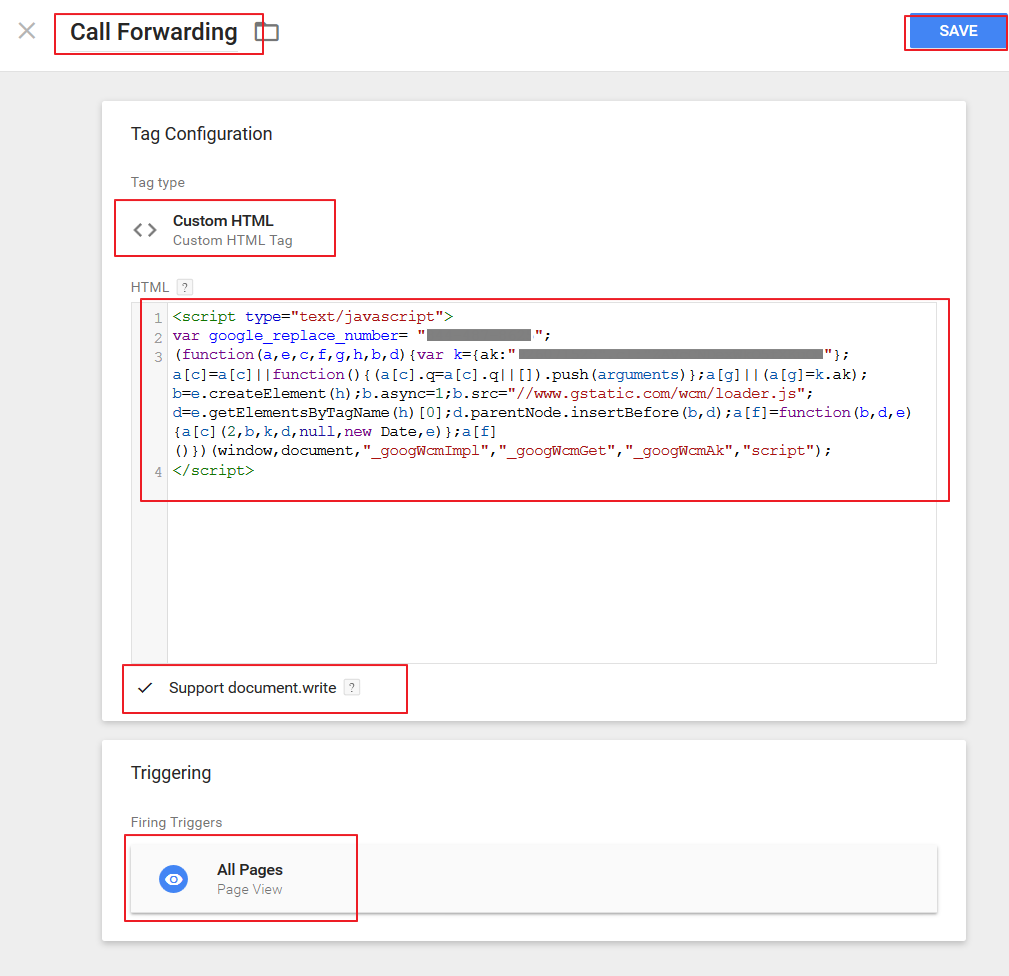
2) Open up Google Tag Manager and create a new tag. Name your tag something descriptive such as “Call Forwarding.”
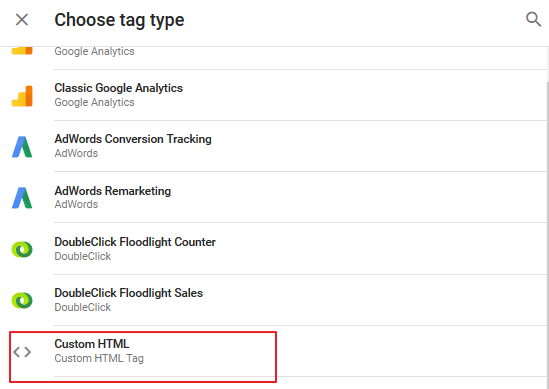
3) Choose Tag Type: “Custom HTML:”
4) Paste the script you grabbed from your AdWords account in step 1 into the text field.
5) This part is the key, add the below line to the top of your script just below the opening <script> tag. Make sure to place the number you wish to replace on your site in the “var” tags in the exact formatting it is found on your site:
var google_replace_number= “###-###-####”;
6) Check the box just below this text field for “support document.write”
7) Use the default Google Tag Manager firing trigger “All Pages”
8) Save your tag:
9) Publish your container.
That’s it! That’s how to set up Google AdWords website call forwarding with Google Tag Manager. If you’d like to test the number replacement then follow these instructions, which state to simply be logged in to your AdWords account on the same browser and add #google-wcc-debug to the end of your URL. This enables the debug overlay. You’ll need to click “force” on the overlay. At this point, look for the number to change.


